
NOTE: PowerPoint for Windows versions 2016 and 2013 are very similar. This section describes both. Screenshots from the 2013 version may differ slightly from the 2016 version but most features work the same way.
PowerPoint 2016 includes a few new features not in version 2013. Features unique to 2016 are identified below by the highlighted text New for 2016.
1. Launch PowerPoint by clicking its program icon. Choose a template, or start from scratch by selecting Blank Presentation.
![]()
When you start a new presentation, you may see default text boxes in the slide window.
These boxes are used for the title slide of a presentation. You don't need them, so delete them by selecting them with the mouse cursor and pressing the delete key.

2. To specify the dimensions of the poster click the Customize icon under the Design tab. Then click Slide Size.

In the Slide Size dialog box, enter the Width and Height for your poster. For example, a typical poster could be 56" wide by 36" high. Be sure that the printer you plan to use is able to print at the size you specify.

Note: The maximum page (slide) size in Powerpoint is 56" by 56".
If you want a poster that is longer or wider than 56" we suggest that you create your poster at half-size. Then when you print it, print it at 200% size. For example, if you want your finished poster to be 40" by 80", set your poster size to 20" by 40". Then print it at 200%.
Keep in mind that if you are creating your poster at half-size, everything in it (text, heading, charts, images) will end up being twice as large in your finished poster. So, for example, if you create a title that has a font size of 48 points, in the final poster it will be 96 points.
If you want to use a background color other than white, you can change it. Click on the Design tab, then click Customize and Format Background. Choose a light color.

To add text to your poster, click Text Box under the Insert tab. Then click and drag to create a text box.

You can move a text box by clicking on an edge of the text box and then dragging it. You can resize a text box by dragging its handles.
To change its formatting, select text and then choose options in the popup box.

You can also format text using formatting options under the HOME tab. To add bullets, select the lines to which you want to add bullets, then choose bullet options from the paragraph area of the toolbar.

Shapes and Lines
To add shapes or lines, click on the Shapes icon in the toolbar. A dropdown menu appears which allows you to choose from many different shapes. Choose a shape, then click and drag to add it to your poster.

To align shapes (or text boxes), select the objects you want to align, then click on the Arrange icon in the toolbar (just to the right of the Shapes icon). Then choose one of the Align options.
The Arrange icon also reveals options for ordering and grouping objects. When objects overlap on the screen you can change the "stacking order" by choosing options under Order Objects. You can group items together by choosing Group Objects.
To constrain proportions as you are drawing or editing an object or image, press the SHIFT key down as you drag on one of the "handles" (small circles and squares that appear around an object that indicate it is selected).

Right-clicking on an object or image lets you access additional editing options, including
Note: Right-clicking on the background lets you access additional formatting options:
To add an image to your poster, choose Insert Picture from File..., which allows you to browse your computer for image files.

Once you've added an image, you can resize or repostion it by dragging its handles.

You can alter and add effects to your picture in various ways, including
Adding a border or shadow:

Adjusting the color (Picture Color):

Adjusting the layout (Picture Layout):

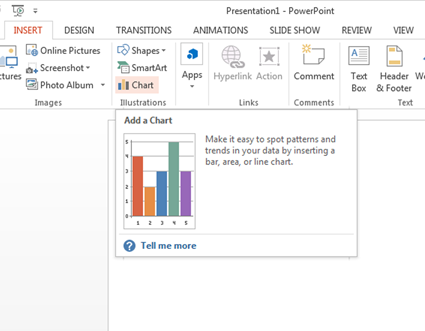
To add a chart, choose the INSERT tab and click on the Chart icon.
An Excel spreadsheet will open where you can enter your data. If you need to change something in your chart, you can right click on the Chart and go to Edit Data (the Excel spreadsheet is saved with your Powerpoint file). This is the benefit to creating the chart in PowerPoint, because you can easily change data, and the chart will resize automatically.

Note: In general it is a good to avoid 3-D chart unless you have a specific reason for doing so. 3-D charts are often more difficult to read.
Choose Chart options (chart elements, styles, and filters) by clicking on icons to the right of the chart.
New for 2016
PowerPoint 2016 for Windows features several new chart types, which are especially useful for anyone interested in data visualization.
The following example illustrates inserting a treemap chart in PowerPoint 2016:


New for 2016

1. To print, click on the File tab, and choose Save As.

Choose an easy to access save location, then save the file in PowerPoint. You can also save the file as a PDF for printing.
2. Email your printable file (PowerPoint or PDF) to ask@stmary.edu, along with your contact information and time you will want to pick the poster up. Poster printing can take up to 72 hours and only takes place weekday daytime hours.